![]()
Setting Up a Floppy Server
Al Miner
2001.03.15
My Turn is Low End Mac's column for reader-submitted articles. It's your turn to share your thoughts on all things Mac (or iPhone, iPod, etc.) and write for the Mac web. Email your submission to Dan Knight .
While surfing the Mac auctions the other day I noticed that the original compact Macs were getting ridiculously cheap. SE/30s hover around $25, while an SE gets no bids at $5.
This is understandable: "slow" is a charitable term to apply to the
processors in these machines. Their original hard disks 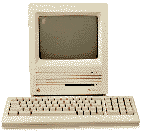 have a
smaller capacity than Zip disks, and some of them can't use more than
4 MB of memory.
have a
smaller capacity than Zip disks, and some of them can't use more than
4 MB of memory.
Useless, right?
Well, maybe not. The cost (less than $50 in the auctions) and the minor surgery of adding an Ethernet card to an SE or SE/30, can give you the ultimate USB Mac accessory. In one device you get a floppy disk drive (with caveats), a SCSI controller capable of driving up to seven additional devices, a tiny hard drive (possibly), and a whole other computer which can still do everything a computer could do in 1987 and then some. Best of all, you get all the charm that a compact Mac exudes.
A note: in the directions below, unless I mention the SE and SE/30 separately, SE refers to the family of computers to which the SE and SE/30 belong. I briefly considered referring to this family of Macs as the SE/x family. You can see why I decided otherwise.
Here's what to do.
1. Get a Mac SE or SE/30
The online auctions have them. The thrift shops have them. The garage sales have them. Be careful, though, since only certain classic Macs will do what we want. Mac 128s, 512s, Pluses, Classics, and Classic IIs do not have expansion slots like the SE and SE/30, so they aren't nearly as easy to put on an Ethernet network. The first SEs shipped with 800 KB Mac format only floppy drives, so you'll want to get an SE FDHD (Floppy Drive, High Density), an SE SuperDrive (same thing, cooler name), or an SE/30, which all had MS-DOS format compatible 1.4 MB floppy drives.
It'll need at least 4 MB of RAM (either already in the computer or in the form of four 1 MB 30-pin SIMMs). Most SEs that have survived this long have 4M of RAM already installed, but some stock 2.5M machines are still around. Don't pay more than $5 a SIMM for 30-pin RAM if you have to buy more. If your SE is a 2.5 MB, you'll only need to replace the two 256k SIMMs with 1 MB SIMMs to bring it up to 4 MB. SEs have a RAM ceiling of 4 MB (which was a ton of memory in 1987). SE/30s have the still impressive limit of 128 MB, but if you can find eight 16 MB 30-pin SIMMs, you're fairly extraordinary.
Don't pay more than $15 for an SE FDHD, and don't pay more than $30 for a stock SE/30. SE/30s were hot machines in their day, and it isn't impossible to find a very customized example with a huge hard drive and up to 128 MB of RAM. Pay what you feel is reasonable for a custom SE/30. Try to find a system with the keyboard, mouse, and the necessary RAM, so you don't have to search for them separately.
If you can find one with an Ethernet card installed, add $5 to the price you'd pay - and subtract the whole painful process described below.
If you can't find an SE with an Ethernet card built in, look in the same places you found your SE. Don't pay more for an Ethernet card than you did for the rest of the computer! SE and SE/30 cards are not interchangeable (SE/30 and IIsi cards are interchangeable, and a IIsi with an Ethernet card might be cheaper and easier to find than the card alone), so make sure to get the correct card for your machine. Make sure the driver setup floppy comes with it.
2. Install the right System Software.
System 7.0.1 is about perfect for a 4 MB SE or an 8 MB SE/30, and it's free for the downloading from Apple's web site. System 7.5.5, also free, has more functionality, but it requires more resources. If you have an SE/30 with 8 MB or more RAM and an 80 MB or larger hard drive, go for it. Don't bother buying Systems 7.6 or 8.x for an SE/30; it's processor is a generation too old to work with them.
If you are a purist or a masochist, you can probably accomplish everything I mention later with 2.5 MB and some version of System 6, but my directions won't necessarily work.
3. Install the Ethernet card. (skip to 4 if your SE already has Ethernet)
This can be a daunting process for those unfamiliar with the insides of a compact Mac. It really isn't all that complicated, though. Follow any installation directions that come with the card or follow my directions below.
I really can't encourage you enough to try to find an SE with an Ethernet card already installed. However, if you are up for the challenge, here's how.
First, the standard warning: WHENEVER OPENING AN ALL-IN-ONE MAC (or any TV or computer monitor), AVOID THE "SUCTION CUP" ON THE BACK OF THE SCREEN TUBE. ENOUGH ELECTRICITY TO KILL YOU HIDES UNDER THERE. Be extremely careful with anything associated with the screen tube, including the entire analog board. Electrocution isn't fun.
A) Start by removing all four screws from the back. There are two screws in the recess below the handle grip on the top of the case, and one at each end of the line of ports at the bottom of the back. The heads on all of these screws are Torx, so you might have to buy or borrow a tool. Make sure your Torx driver has a long enough shaft to get to the handle screws. Sears sells one for less than $5.
B) Once the screws are out, use your fingernails and all of your patience to slowly work the entire front chassis away from the back cover, prying with a screwdriver or knife will just mar the case. One helpful tip: put the bottom two screws back in a turn or two, then push in on them with your thumbs while pulling back with your fingers on the side, this will help to pop the back cover off of the chassis.
If you need to add RAM, do it now, by disconnecting all of the cables attached to the logic board, and sliding it out of the chassis. The SIMM slots are easy to spot, the SE has four and the SE/30 has eight. Read Low End Mac's SE/30 page for info about putting more than 8 MB in an SE/30. Put in the memory you want, slide the logic board back in, and reconnect the ribbon and power cables.
As long as you have the case off of the SE, this would be a good time for a few other improvements. Blow compressed air through the floppy drive to clean it out. If you have a spare larger Mac SCSI HD, then by all means replace the 20M or 40M disk that's in there.
C) Slide the Ethernet card into the Processor Direct Slot, on the side not blocked by the analog board, and attach the interface (the Ethernet jack) card to the chassis with two little screws.
Make sure you remove the spacer on the back cover, so that you can get to the Ethernet interface card you just installed, and then put the cover carefully back on the computer.
If you've done everything correctly you should get the happy Mac when you switch it back on. If not, make sure all your connections are nice and solid and try again. I would recommend not putting the screws back in until you've verified the computer's functionality.
D) Install any Ethernet drivers that came with the card.
3. Create an Ethernet network between your USB Mac and your SE.
Not too much physical effort here, just cables and Control Panels.
A) Buy or make a "crossover cable." A regular Ethernet patch cable will not work between two Macs. An 8' crossover cable costs about $10. Connect the crossover cable to both computers.
If you have an Ethernet hub, you could use it between the two Macs with regular patch cables connecting them instead of the crossover. If you are only going to have these two computers, it is less expensive to simply use a crossover cable.
B) On the SE, open the "Network" Control Panel and set AppleTalk to use the Ethernet port. Close the Control Panel.
C) On the USB Mac, open the "AppleTalk" Control Panel and set it to Ethernet. Close the Control Panel. (Yes, this is the default, but humor me and do it anyway.)
D) On the SE, open the "Sharing Setup" Control Panel. Give the SE an owner, a password, and a name, and then click the "Start" file sharing button. Close the Control Panel.
E) On the USB Mac, open the Chooser. Select AppleShare, and then select the SE as a file server. Enter the owner's name and password.
Select any drives on the SE that you wish to share. If it has an internal hard drive, you can connect up to six external SCSI devices to the SE, including external hard drives, CD-ROM drives, Zip/Jaz drives, and SyQuest drives. Anything the SE can mount and share can be used by the USB Mac. Check the check box next to each device you'd like to mount at start up, and set the radio button to save your name and password.
Close the Chooser.
F) On the USB Mac, open the "File Sharing" Control Panel. Give the USB Mac the same owner, a password, and a name, and then click the "Start" file sharing button. Close the Control Panel.
G) On the SE, open the Chooser. Select AppleShare and then select the USB Mac as a file server. Enter the password. Select the USB Mac's start up volume, and check the mount at start up box.
H) On the SE open the USB Mac's start up volume. Find the "Desktop Folder." Make an alias to the Desktop Folder and drag it to the SE's desktop. Rename the alias "Floppy Server" or something similar.
Unfortunately you can't directly share floppy disks. You can, however, on the SE, drag the floppy's icon onto the "Floppy Server" (Desktop Folder alias) icon. This will cause a folder, identical to the floppy disk, to appear on the USB Mac's Desktop.
This is an extra step, but it is also the reason an SE is the perfect SCSI Mac for this purpose. Another SCSI Mac could do the same thing, but would require a CPU case and monitor and all the additional space and cords that would add. The SE just sits there happily with its tiny footprint, and its buckets of style.
I) Other possibilities.
You could follow basically the same procedure above but put the floppy 's files in another location on the USB Mac. For instance: another local volume's Desktop Folder, a specific folder in one of the volumes (not on the Desktop), or on a RAM disk. You could also go to the trouble of using DiskCopy to create a disk image of the floppy and share that across the network.
J) Stand back and admire your creation.
So, what have you got for your effort?
You have a modern USB Mac that can cruise the Internet, play all the newest games, play your MP3s, and generally be the coolest computer on earth, just like it was straight out of the box.
You also have a classic Mac with all its charm and functionality attached to your USB Mac. You can surf the Internet on your USB Mac for games and screen savers and other applications for your SE. If you are working on something on the USB Mac, you can pop over to the SE to use the calculator, or to play a quick classic Mac game like Stuntcopter, or solitaire, or reversi, or Risk, or Star Wars, or....
You can connect all those SCSI peripherals you've ignored for years. With the right software, you can share some of your serial peripherals, like that old StyleWriter, as well.
With the right software on your USB Mac, you can even share your Internet connection with the SE, making it the perfect E-mail checker or UNIX terminal. if you're a fan of ancient Internet applications you could scrounge up a copy of MacWeb and see what the Web looks like in black and white.
An SE vs. a USB FD
Cost
USB FD: A USB Floppy Drive costs $75-$99. It plugs right in, and set up takes at most 3 minutes.
SEs: Our "worst case," an SE FDHD with a 20 MB hard drive and 2.5 MB RAM at $10, a Torx driver at $5, two 1 MB 30-pin SIMMs at $5 each, an Ethernet card at $10, and a crossover cable at $10, adds up to a total price of $45 and about an hour of assembly and set up.
Our "best case," an SE/30 with a 250 MB hard drive, 20 MB RAM, and an Ethernet card already installed at $35 and a crossover cable at $10, adds up to a total price of $45 and about 30 seconds to connect the crossover cable to the machines, and 5 minutes to set up.
Winner: SE/30. The extra $30-$54 you'd save makes up for the 2 minutes difference of set up time. It's up to you if an hour of your time is worth $54 savings for the SE.
Ease of Use
USB FD: A USB floppy drive mounts, reads, writes, and ejects 1.4 MB floppy disks traditionally and quickly. However, it cannot mount 800 KB floppies.
SE: An SE requires copying the floppy's files to one of the USB Mac's volumes, which can take up to a minute. And you have to throw away the copied files on the USB Mac as well as ejecting the floppy itself from the SE, when you're done.
Winner: The USB FD is easier to use.
Style
USB FD: A USB Floppy Drive is usually some version of curvy translucent plastic. All very nice and USB Mac complimentary, assuming of course that your USB Mac and your USB FD are the same color. The tiny size of a USB FD makes it easy to hide if it clashes.
SE: An SE does not match your USB Mac. It is, however, the very essence of Mac-ness and a great contrast to the latest Macs, especially iMacs. Compact Macs are the '55-'57 Chevys of Mac style - they always look cool, even next to a new Ferarri (that's the USB Mac, for the simile impaired).
On the other hand, its footprint is considerably larger than a USB floppy drive, especially considering keyboard and mousing space.
Winner: To me, it's the SEs. I'd rather have a whole '57 Chevy than just a matching car-top carrier for my new Ferarri. Of course, I have a big garage.
Other Features
USB FD: none.
SEs: The SE is a slow but fully functional SCSI Mac. You can play games, process words, check email, and open and save files. You can load up its SCSI controller with seven sharable SCSI peripherals and share certain serial devices, too.
SE/30s were widely used as servers back in their day. They can still run freeware web, file, and mail servers.
SEs make really cool alarm clocks.
With some toys from the Radio Shack catalog, SE/30s can run all your X10 controlled appliances and lights in your "home of the future!"
And some day when we're all using telepathic interfaces to control our TeraHertz quantum computers, a broken SE will still make a great fish tank.
Winner: The SEs.
If you have the need to use floppy disks on your USB Mac, there are two ways you can go. You can go the reasonable, easy, slightly more expensive way, or you could adopt a compact Mac into your home. Even if you already have a USB floppy drive attached to your USB Mac, the SCSI controller and the style make an SE worth the time, space, and money.
As a last note, almost everything you can do with an SE/30 can be done with a Color Classic. If only they were $35 on the auctions!
  ___ ___ __ __  __ _____ ______  ___  __
 |   V   |  |  \|  |  ___|      \/   \|  |
 |       |  |      |  _)_|   O  /  O  \  |__
 |__|V|__|__|__|\__|_____|__|\__\_/ \_/_____)

                  Al Miner
     Computer Guy, St.Thomas More School
      3515 S.48th Ave. Omaha, NE  68106
      e-mail: mineral@STM.creighton.edu
        web:  http://www.STMomaha.org
Share your perspective on the Mac by emailing with "My Turn" as your subject.
Join us on Facebook, follow us on Twitter or Google+, or subscribe to our RSS news feed
Today's Links
- Mac of the Day: Power Mac 9500, introduced 1995.05.01. The first PCI Power Mac has 6 expansion slots, speeds of 120 and 132 MHz.
- Support Low End Mac
Recent Content
About LEM Support Usage Privacy Contact
Follow Low End Mac on Twitter
Join Low End Mac on Facebook
Favorite Sites
MacSurfer
Cult of Mac
Shrine of Apple
MacInTouch
MyAppleMenu
InfoMac
The Mac Observer
Accelerate Your Mac
RetroMacCast
The Vintage Mac Museum
Deal Brothers
DealMac
Mac2Sell
Mac Driver Museum
JAG's House
System 6 Heaven
System 7 Today
the pickle's Low-End Mac FAQ
Affiliates
Amazon.com
The iTunes Store
PC Connection Express
Macgo Blu-ray Player
Parallels Desktop for Mac
eBay
![]()
