Mac2Windows
VirtualBox 3.0: Free Virtualizer Is Almost Grown Up
- 2009.07.13 - Tip Jar
Follow Alan Zisman on Twitter.
Mac users tend to feel (with justice) that the Mac OS is the best desktop operating system available. Nevertheless, there are times when they might have need for software that is only available for some other operating system - Linux or even (gasp!) Windows.
Programmers may want to use a Mac but need to create and test code designed for other operating systems. Web designers need to see how their pages look in a variety of browsers - both for the Mac and elsewhere. Some users may have data files that require specific applications - Microsoft Access database files and Microsoft Publisher page design files, for instance, require applications only included in the Windows versions of Microsoft Office.
Then there are games.
For whatever reason, many loyal Mac users need access to something else some of the time.
Lots of Options
Apple's move to Intel-based systems in 2006 gave Mac users more ways to run Windows, Linux, and other PC operating systems and applications on their Macs. For instance, Apple's Boot Camp lets Mac users set up their systems to dual-boot between Mac OS X and Windows XP or later.
Booting a Mac directly to a PC operating system offers the best performance and may be the only way to get a graphics-intensive game to run on a Mac. But when booted to another operating system, a Mac user no longer has access to all the things that made him or her choose a Mac - Mac OS X and applications designed for the Mac.
The use of Intel processors on Macs, however, lets Macs run other operating systems designed for Intel systems virtually - letting Windows, Linux, or what have you run on the Mac at the same time that Mac OS X is running.
Virtualization Options
Two commercial virtualization programs - Parallels Desktop and VMware Fusion have each gained their fans among Mac users. Each, costing about $80, runs an assortment of non-Mac PC operating systems virtually on any Intel Mac. The competition between the two has been fierce: Parallels was first and gained early market and mindshare among Mac users, and latecomer VMware Fusion claims to have gained the larger market share.
There is a third virtualization software option, though, with the advantage of being free.
VirtualBox is available for Mac OS X, Windows, Linux, and Sun Solaris operating systems ("hosts" in virtualizer jargon). Originally developer InnoTek was purchased by Sun Microsystems, which has continued development. VirtualBox is available in two versions; both are free for personal use. A basic edition has been open sourced under the Gnu Public License (GPL). The closed-source edition is free for personal use and corporate evaluation under the VirtualBox Personal Use and Evaluation License: enterprise users are expected to purchase an enterprise support contract from Sun.
The closed-source edition has only a few differences from the open source version; the most noteworthy is a virtual USB controller. I suspect most readers will be using the software for "personal use" and will get the closed-source edition. On the download page, this is the edition you see first; the open source version downloads are available, but you need to scroll "below the fold" to find them.
About VirtualBox.
I wasn't sure which version I had installed, and the About Virtual Box dialogue box didn't exactly enlighten me.
You may notice that the version number is 3.0. I first looked at VirtualBox in July 2007, when it was definitely a work in progress, lacking important features. When I returned to it just over a year ago, in May 2008, the program had progressed to version 1.6 and improved quite a bit.
Installing VirtualBox 3
Version 3 is a 62 MB download. Setup remains straightforward: double-click the installer and follow the instructions. Note that a dedicated uninstall program is included - somewhat unusual for Mac software. It is not, however, necessary to uninstall older versions before installing the new version.
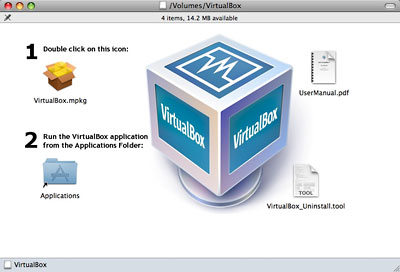
Installing VirtualBox on Mac OS X.
If you've been using an older version of VirtualBox, the current version will happily continue to use any already-installed "guest" systems. For this review, I had a previously installed Ubuntu guest and created a new Windows XP installation.
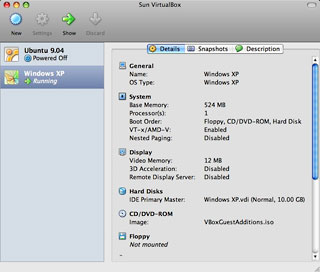
Ubuntu and Windows XP "guests" for VirtualBox.
The basic interface is straightforward, and pretty much unchanged from the version I looked at last year.
Clicking the New button opens a wizard that walks the user through steps to create a new "guest" virtual system. Again, this is only minimally changed from last year - you can now pick presets for the upcoming (but widely available in pre-release) Windows 7, for instance.
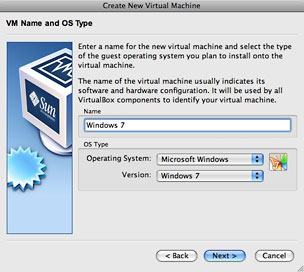
Create a new virtual machine.
(Despite the picture, I didn't actually create a Windows 7 virtual machine; my Mac has 2 GB RAM, and that's not enough to allow either Windows 7 or Vista and Mac OS X to run happily together. I've got a Windows 7 virtual machine installed using VMware Fusion, but when it's running - dedicating 1 GB of RAM to it - neither it nor OS X are happy campers).
64-bit operating system versions are supported by VirtualBox, which is also the case with VMware Fusion and Parallels Desktop.
After choosing the operating system, you're presented with dialogue boxes to set the amount of RAM used, and then to create the virtual hard disk - a file on your Mac that the guest operating system thinks is a physical hard disk. You can choose to make that virtual hard disk dynamic or fixed - the default is dynamic, meaning that it will only take up as much space as is actually being used; it will expand as needed up to a preset maximum.
And that's it - only a few choices, and you're ready to go.
Tweaking Configuration
Before you start it up for the first time, though, take a moment to click on the Settings icon; you can change any of your choices and may want to fine-tune the defaults.
Some of these settings are new. For instance, like VMware Fusion (but not Parallels Desktop), VirtualBox now supports multiple processors - up to 32 CPUs.
Clipboard sharing is turned on by default. Options let you turn it off or limit to sharing from the host (i.e. Mac OS X) to the guest (i.e., Windows, etc.) or the reverse. My recommendation: leave it bidirectional - the default.
3D Video Acceleration is turned off by default - you might want to experiment with turning this on. None of the virtualization programs do a great job of supporting 3D video - that's why gamers are probably best off installing Boot Camp and booting directly to Windows to play games that are not available for Mac OS X.
The new version of VirtualBox does an okay job of supporting OpenGL - as a result, Linux's Compix eye candy works, for instance. Direct X 8 and 9 support for Windows is "experimental", and there is no Direct X 10 support at this time. As with its commercial competitors, VirtualBox's 3D video support remains a work in progress.
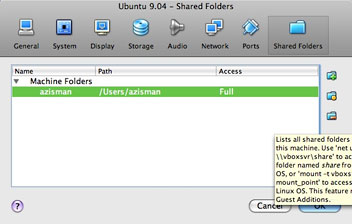
Mapping a shared folder in VirtualBox 3.
Worth going to in the settings: Shared Folders. Adding a shared folder - perhaps to your Mac's Home folder - allows you to access documents saved on your Mac in your virtual session or to save files to your Mac so that they can be accessed by your Mac's applications.
Note, however, that the shared folders aren't necessarily easily accessible in the guest operating system - in Windows XP, for instance, you can find VirtualBox Shared Folders listed in My Network Places, and you can "map" your shared folders, giving them drive letters for access in My Computer, but you need to know where to look and what to do to make them accessible.
Installing a Guest Operating System
Okay, you're finally ready to start up your newly created virtual system; you'll need to install an operating system to make it work. You can do that using a physical install disc (CD or DVD) or an ISO disc image file. Use the program's Devices menu to mount the image file so it is recognized as if it were a physical disc.
Pressing F12 at the beginning of (virtual) bootup lets you choose the boot device. I don't see an option to boot to a USB device, just the hard drive, CD drive, floppy disk (!), or network. Too bad.
Installing your choice of Windows, Linux, etc. should work the same as installing it onto a physical computer.
Post install, with your virtual system running, it's important to install VirtualBox's Additions, as with Parallels or VMware. These additions replace the default video and network drivers and add useful features like cursor sharing - without this, the mouse is "trapped" within your virtual session's window, and you need to press the left Cmd key to use the mouse and keyboard in other Mac programs.
Clicking a menu item causes the virtual system to think that the Additions file is an inserted CD; in Windows, the setup program then runs automatically. (In order to make use of 3D Video Acceleration in Windows, the Guest Additions need to be installed while booted to Windows Safe Mode.)
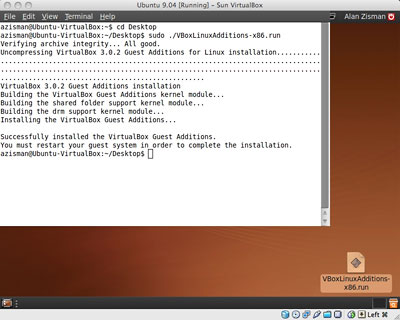
Ubuntu 9 mounts the Additions disk image to its desktop.
In Ubuntu 9.04 Linux, I found a CD icon on the desktop with files for "x86" and 64-bit Linux; the x86 file ran in the terminal without a hitch, which hadn't been the case doing the same operation in Parallels Desktop, where I was hindered by Parallels' lack of support for recent Ubuntu versions.
After installing the additions, you'll find another neat feature - resizing the virtual session window changes the screen resolution in the guest operating system (at least it works in Windows XP and Ubuntu), making it easy to fit your window to space available on your Mac desktop while having the guest operating system display at its best. However, it's easy to end up with odd virtual desktop resolutions.

Resizing your session window can result in unusual resolutions.
Seamless Mode
Parallels Desktop and VMware Fusion both include features to break Windows applications out from the rigid box of a virtual OS window, letting users integrate them with their Mac desktop. Parallels calls their feature "Coherence", VMware Fusion's equivalent is called "Unity". VirtualBox's offers "Seamless mode", and it was usable with both my Windows and Ubuntu virtual systems.
When chosen, the virtual system's window disappears, but the Windows taskbar, including start menu (or the Ubuntu top and bottom bars) remain, floating across the bottom of the screen just above the Dock. You can open programs; their windows can be mixed and matched on your Mac desktop with your native Mac program windows. Frankly, it's not a feature (whether in its Parallels, VMware, or VirtualBox incarnations) that I'm particularly fond of.
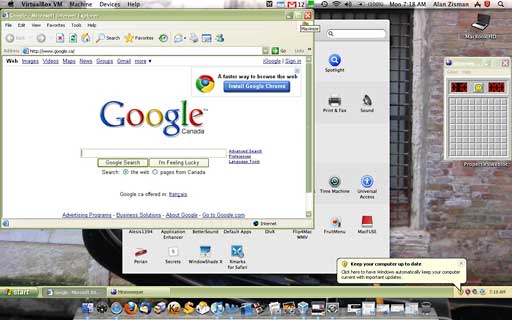
Seamless mode puts the Windows Start bar above the Mac's Dock.
A Few Missing Features
For me, the big still-missing feature is support for Boot Camp installations. Both commercial virtualizers recognize a Boot Camp Windows installation and offer to run it in a virtual session, a nice way to have the benefits of both Boot Camp (better performance - especially video performance for games) and virtualization (being able to run Windows and Mac OS X at the same time) while only requiring drive space for a single installation.
Also missing is drag and drop between the Mac and Windows desktops. That's handy sometimes, but not a deal-killer, in my opinion. With shared folders in place and a little fussing about, it's possible to put a shortcut to the Mac desktop on the Windows desktop, for instance, effectively enabling drag and drop between the two operating system, though not as straightforward as simply dragging an icon from the Mac desktop and dropping it into the virtual session window (or vice versa).
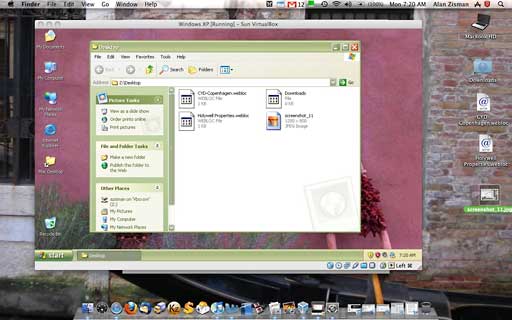
An alias for the Mac Desktop can help make up for no Drag and Drop
between operating systems.
Other than these few features, VirtualBox has pretty much caught up with its commercial competitors. Performance is pretty snappy, 3D video acceleration is coming along, and its 64-bit and multiprocessor support surpass Parallel's.
And the price is right.
Windows Warning
Note, however, that when you purchase Parallels Desktop or VMware Fusion, you get a license to a Windows antivirus utility as part of the deal. If you go online, your virtual Window session is just as vulnerable to the gamut of Windows malware as you would be on a physical Windows computer.
If you install a version of Windows using VirtualBox, you'll have to
get your own antivirus and other security software. AVG
Anti-Virus Free Edition is a good choice. (Widows
Defender, Microsoft's free antivirus program, is included with
Vista and is also available for Windows XP SP2.)
![]()
Join us on Facebook, follow us on Twitter or Google+, or subscribe to our RSS news feed
Alan Zisman is Mac-using teacher and technology writer based in Vancouver, BC, Canada. Many of his articles are available on his website, www.zisman.ca. If you find Alan's articles helpful, please consider making a donation to his tip jar.
Today's Links
- Mac of the Day: PowerBook 500 Series, introduced 1994.05.16. 'Blackbird' includes a 25 to 33 MHz 68040 along with smart batteries and grayscale or color displays.
- Support Low End Mac
Recent Content
About LEM Support Usage Privacy Contact
Follow Low End Mac on Twitter
Join Low End Mac on Facebook
Favorite Sites
MacSurfer
Cult of Mac
Shrine of Apple
MacInTouch
MyAppleMenu
InfoMac
The Mac Observer
Accelerate Your Mac
RetroMacCast
The Vintage Mac Museum
Deal Brothers
DealMac
Mac2Sell
Mac Driver Museum
JAG's House
System 6 Heaven
System 7 Today
the pickle's Low-End Mac FAQ
Affiliates
Amazon.com
The iTunes Store
PC Connection Express
Macgo Blu-ray Player
Parallels Desktop for Mac
eBay
![]()
